User authentication and authorization are core information security processes in building secure systems. Especially when building multi-tenant SaaS. It requires strict isolation of tenant data, protection against privilege escalation, secure session management, API key leakage prevention, and any other security concerns.
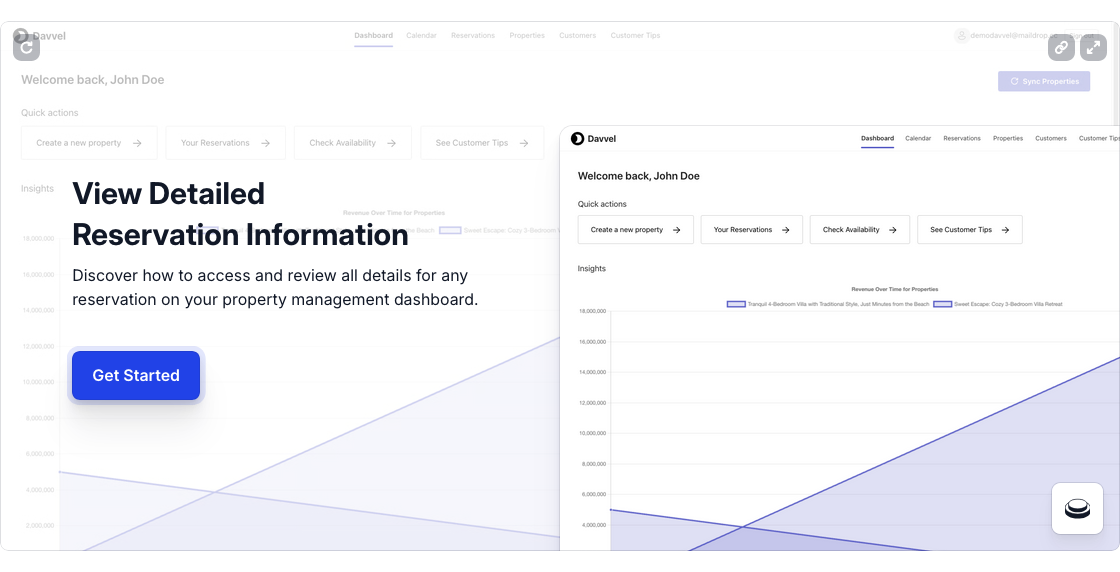
For example, in Davvel is a cloud-based B2B property management system platform. Secure authentication and authorization are critical because it provides services for managing multiple listings (such as hotels, villas, etc.) on various platforms in one centralized system.
Security Concerns
Each customer is referred to as a tenant. We provide to our customers to have direct booking website for handle their bookings, market their listings, payments, guest data, and operations.
All operations are synchronized automatically and integrated with tenant PMS systems. The problem is that we want to make the booking process easier and faster for each guest. This way, guests don’t need to log in, register an account, or do other annoying things. They can just book and pay. So, to access data from their booking website to the internal system, we need a public API.
What we’re thinking:
- Identify the request which tenant it belongs to.
- API must be secure, and easy to consume
- Key leakage prevention
- Scalable
There were several solutions that came to mind, such as cors restriction by domain, identification via http header, or generating unique links, but we wondered if there was a better strategy? These solutions still had potential leaks and not scalable (don’t judge, think twice).
Strategy
HMAC (Hash-Based Message Authentication Codes)
Yes, we use Hash-based message authentication code (or HMAC) approach. HMAC is a cryptographic authentication technique that uses a hash function and a secret key.
HMAC ensures that the data has not been tampered with during transmission by creating a unique hash for each message based on its content and a secret key. This hash is then sent along with the message. Upon receipt, the receiver can generate their hash from the received message and the secret key. If the received hash matches the generated hash, the data integrity is confirmed.
Similarly, HMAC can confirm the authenticity of a message. Because the hash is generated with a secret key, a correctly computed HMAC assures the recipient that the message came from a source possessing the correct shared secret key and therefore is authentic. This double-check of both integrity and authenticity provides a high level of security for data transmission.
Flow:
Let’s say if client is requesting listings endpoint
GET /v1/clients/listings
When this request is called, several data are required:
x-clientid: static data, as a unique identifier for each tenant.x-api-key: static data, as a unique identifier for each tenant, combined with the client ID.x-signature: dynamic signature from /auth/signaturex-timestamp: dynamic timestamp (expires at) from /auth/signature
Initialize
Each tenant must have APP_CLIENT_ID and APP_API_KEY
APP_CLIENT_ID=Lh4guAEGIjh9r1wi
APP_API_KEY=Lh4guAEGIjh9r1wi.BU7LijLitzVmnZULx9C0fDgqi7A5piQyAPec5vAWApkgJgGCafdoOewL61TufzKZ
Ensure client id and api key are stored securely, and not exposed in the codebase.
Call the signature on interceptor
// lib/http.ts

const authenticate = () => {
   const apiURL = "/auth/signature";
   return api(apiURL).post({ clientId: env.APP_CLIENT_ID }).json<AuthenticateResponse>();
};

const apiAuth = async (apiUrl: string) => {
    const currentTimestamp = Date.now();
    const authenticated = await authenticate();

    return api(apiUrl).headers({
        "x-clientid": String(env.APP_CLIENT_ID),
        "x-api-key": String(env.APP_API_KEY),
        "x-signature": authenticated.signature,
        "x-timestamp": authenticated.expiresAt,
    });
};

// sample
await apiAuth(`/v1/clients/listings`);
As you can see, it will call 2 endpoints. First, it calls /auth/signature to generate signature key. Then it calls /v1/clients/listings with the generated signature to get the list of listings.
/auth/signature response:
"data": {
    "signature": "k-657P0YE3D97xCvM9vU-C0G0.Fx1kgawYyUBX8H8tbx7L-7kBl0k",
    "expiresAt": "2025-08-17T02:13:27.634499713Z"
}
/v1/clients/listings HTTP Request:
GET /v1/clients/listings HTTP/1.1
Host: api.example.com
x-signature: k-657P0YE3D97xCvM9vU-C0G0.Fx1kgawYyUBX8H8tbx7L-7kBl0k
x-timestamp: 2025-08-17T02:13:27.634499713Z
x-clientid: Lh4guAEGIjh9r1wi
x-api-key: Lh4guAEGIjh9r1wi.BU7LijLitzVmnZULx9C0fDgqi7A5piQyAPec5vAWApkgJgGCafdoOewL61TufzKZ
Remember, every time /auth/signature is called, it will generate a new signature key and expiration time. We’ll optimize later, if you curious how do we generate the signature key, move into the next section.
Signature generation
Previously, we already generated and stored the client id, and api key to database. We use https://github.com/xdg-go/pbkdf2 to generate a secure signature key, its widely used algorithm for generating a key from password and salt, which makes it more secure than using a simple hash function.
import (
	"crypto/hmac"
	"crypto/sha1"
	"encoding/base64"
)

salt := "saltFromDatabse"
secretKey := "secretKeyFromDatabase" // pbkdf2 generated
tenantId := "tenantIdFromDatabase"

// Create the SHA1 key
key := sha1.New()
key.Write([]byte(salt + secretKey))

// Create the signature hash
hash := hmac.New(sha1.New, key.Sum(nil))
message := fmt.Sprintf("%s:%s", date, tenantId)
hash.Write([]byte(message))
The code generates a signature like this:
signature = HMAC_SHA1( key = SHA1(salt + secretKey), message = date:tenantId )
It’s not done yet, we need to encode the signature into base64 format before sending it to the client.
// Finally, base64-encode the hash, generate signature
b64hash := base64.RawURLEncoding.EncodeToString(hash.Sum(nil))

// Final signature
finalSignature := fmt.Sprintf("%s.%s", salt, b64hash)
Signature verification
Assume, you already sent the signature to the request header
# salt                    # separator   # signature
k-657P0YE3D97xCvM9vU-C0G0 .             Fx1kgawYyUBX8H8tbx7L-7kBl0k
To verify the signature, we need to compares between client signature and server signature.
// Client values (from request header)
clientXTimeStamp := "2023-01-01T00:00:00Z"
clientSalt := "k-657P0YE3D97xCvM9vU-C0G0"
clientSignature := "Fx1kgawYyUBX8H8tbx7L-7kBl0k"

// Server values (fetched from db)
secretKey := "secretKeyFromDatabase" // pbkdf2 generated
tenantId := "tenantIdFromDatabase"

key := sha1.New()
key.Write([]byte(clientSalt + secretKey))

hash := hmac.New(sha1.New, key.Sum(nil))
message := fmt.Sprintf("%s:%s", clientXTimeStamp, tenantId)
hash.Write([]byte(message))

// server-side computed signature
serverSignature := base64.RawURLEncoding.EncodeToString(hash.Sum(nil))

// Compares signature
if subtle.ConstantTimeCompare([]byte(clientSignature), []byte(serverSignature)) != 1 {
	// Signature verification failed
	http.Error(w, "Invalid signature", http.StatusUnauthorized)
	return
}
We put this verification logic in middleware to ensure that all incoming requests are authenticated and authorized before processing them.
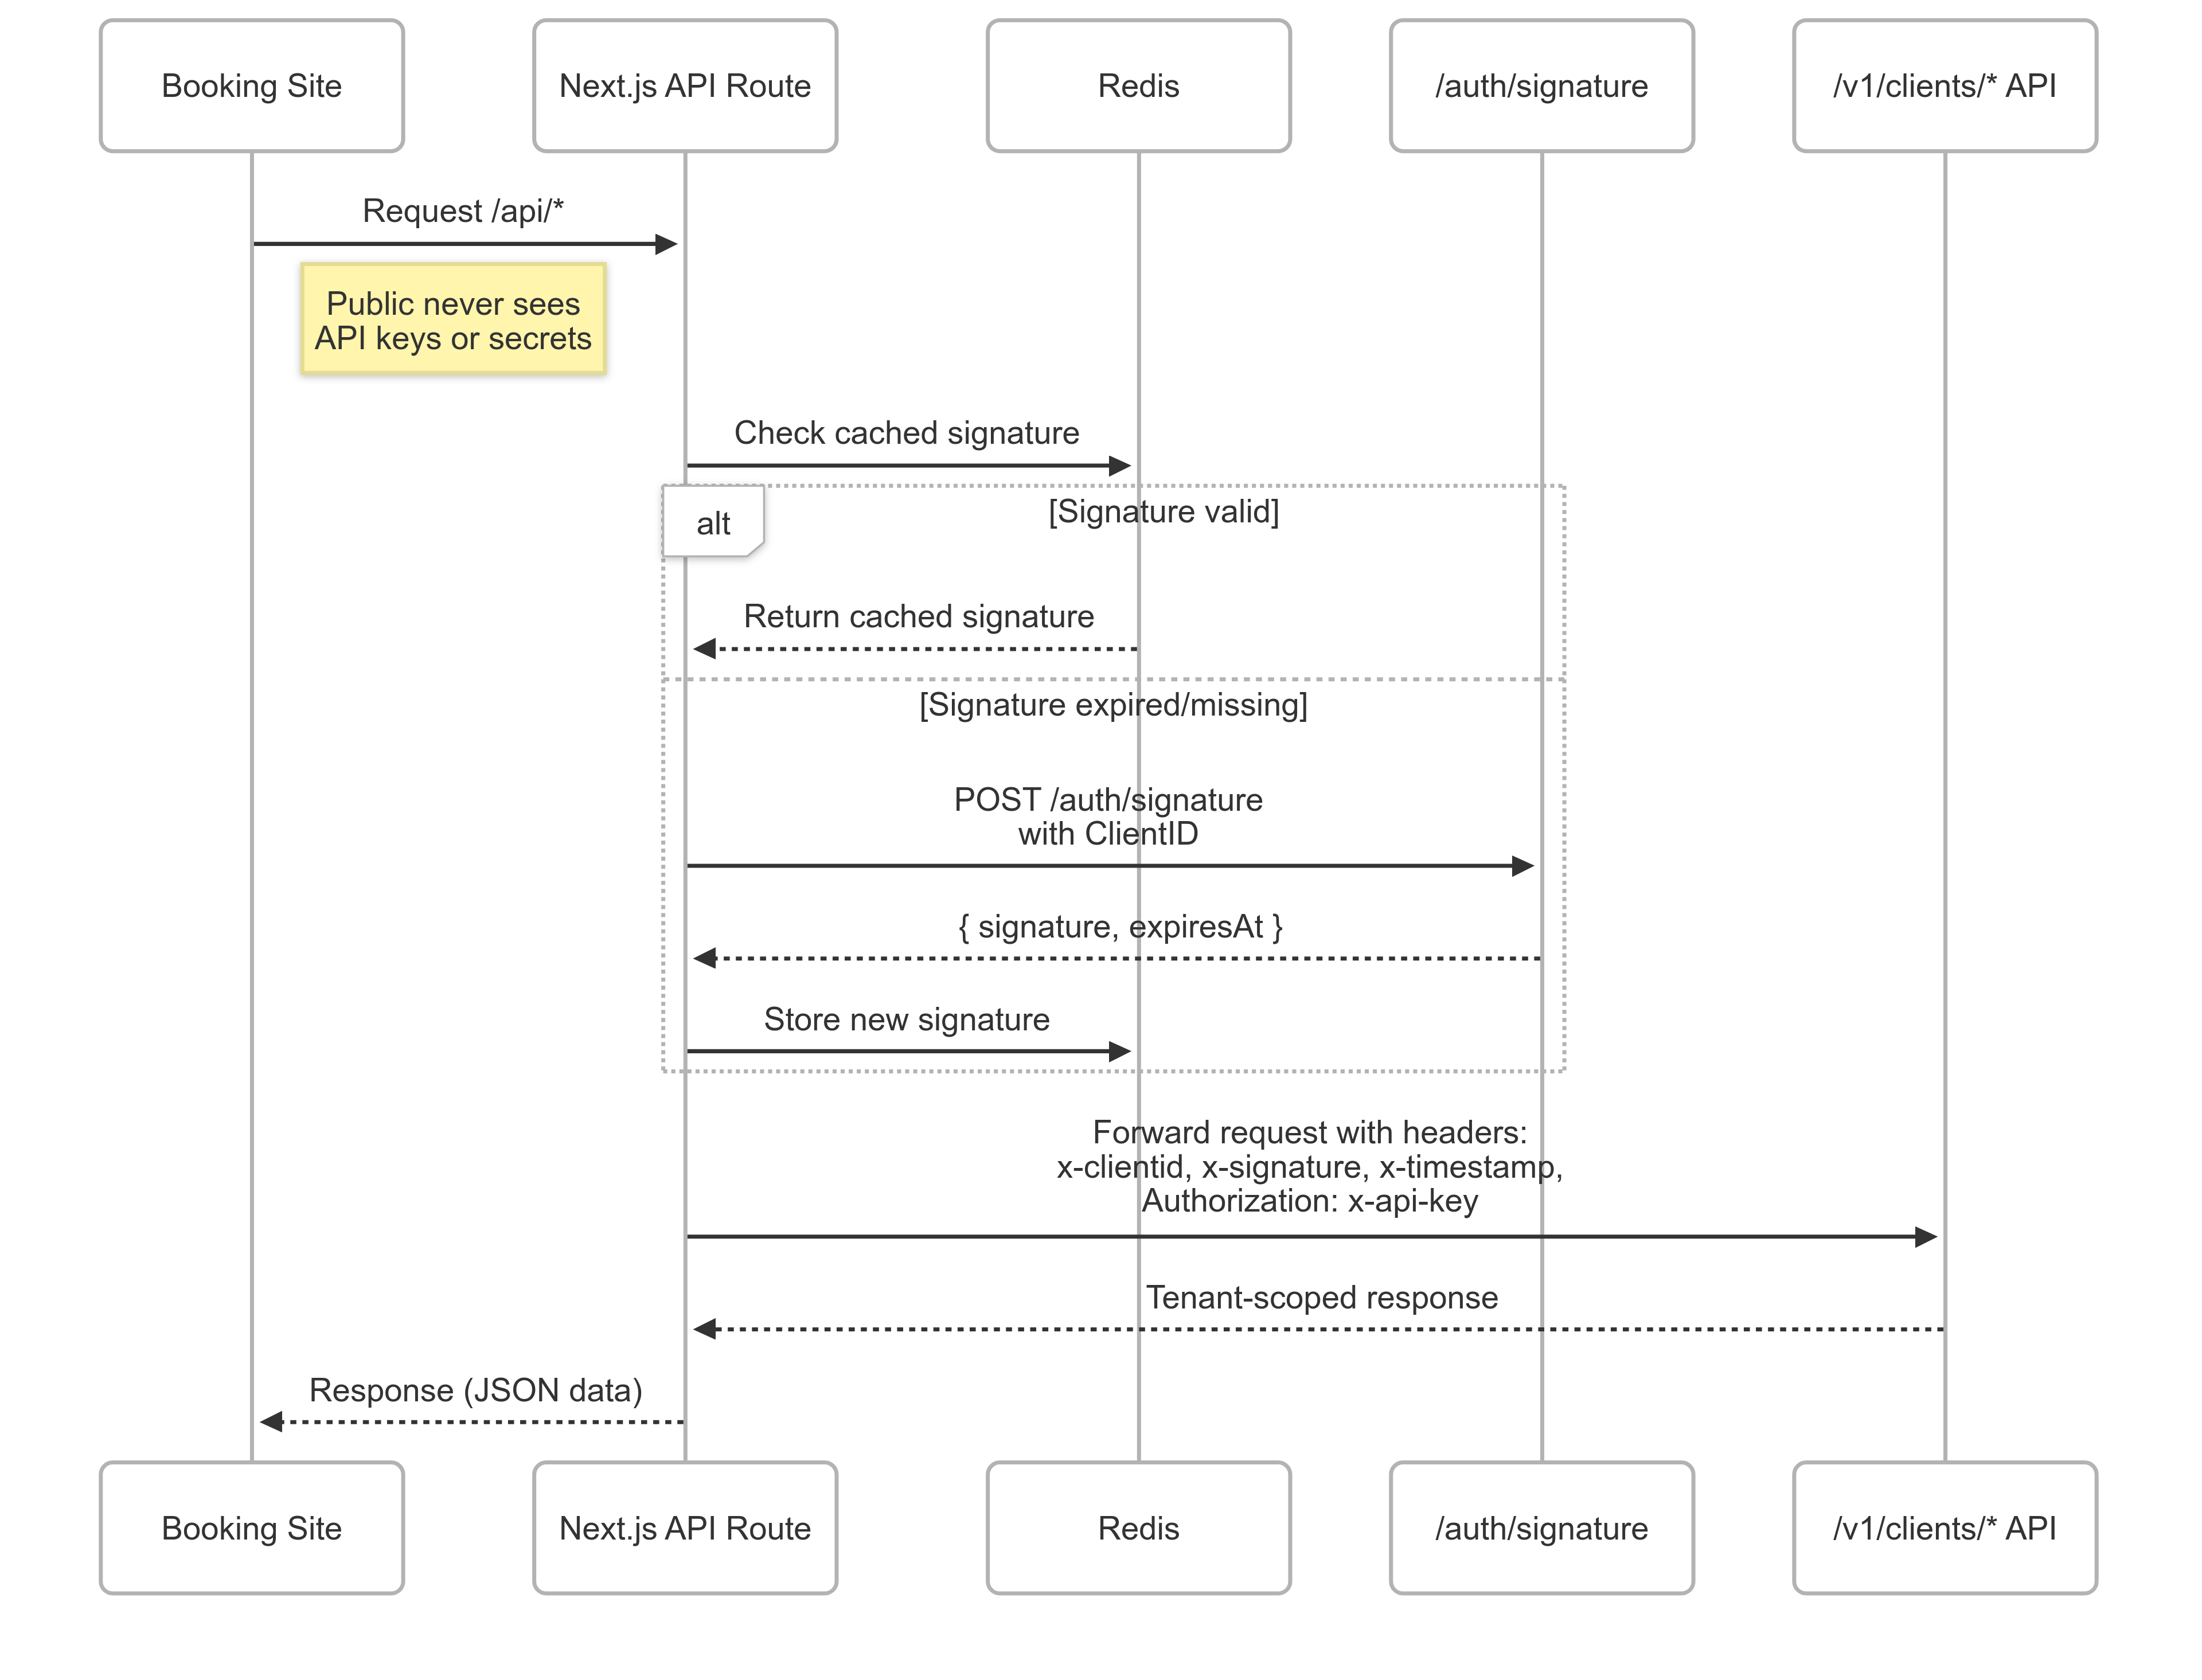
Overall, we almost done. We can now get access to tenant data. But we still have a problem, sensitive information is exposed in request headers. To fix this, we need to implement NextJS API routes.
NextJS API routes is act as a proxy between your client-side application and backend server. So, public never sees tenant credentials.
// /api/listings/route.ts

import { apiAuth } from "@/lib/http";
import { HttpResponse } from "@/lib/utils";
import { NextRequest, NextResponse } from "next/server";

export async function GET(request: NextRequest): Promise<NextResponse<HttpResponse<any>>> {
    try {
        const api = await apiAuth(`/v1/clients/listings`);
        const response = await api.get().json();
        return NextResponse.json(response as HttpResponse<any>);
    } catch (err) {
        return NextResponse.json({ message: "", success: false }, { status: 500 });
    }
}
It means we have 2 layers, when client need listing data, it will called /api/listings. The request is intercepted by the proxy route, which forwards the request to backend endpoint at /v1/clients/listings
Cached Signature
Since the signature request is performed in the interceptor, this will create signature every time. Therefore, we need to cache the signature in Redis. This should be done on the client side.
Update /lib/http.ts
const apiAuth = async (apiUrl: string) => {
    // Get the current timestamp
    const currentTimestamp = Date.now();
    const cachedSignature = await redisClient.get("signature");
    let cachedData = cachedSignature ? JSON.parse(cachedSignature) : null;

    if (!cachedData || new Date(cachedData.expiresAt).getTime() <= currentTimestamp) {
        // If the cache does not exist or is expired, authenticate again
        const authenticated = await authenticate();

        // Store the new signature in Redis with an expiration
        await redisClient.set(
            "signature",
            JSON.stringify(authenticated.data),
            "EX",
            3600 // 1 hour
        );

        // Update cachedData to the new values
        cachedData = authenticated.data;
    }

    // Use the (possibly refreshed) cached data to build headers
    return api(apiUrl).headers({
      "x-clientid": String(env.APP_CLIENT_ID),
        "x-api-key": String(env.APP_API_KEY),
        "x-signature": cachedData.signature,
        "x-timestamp": cachedData.expiresAt,
    });
};
Interceptor will check redis cache,
- If the signature is still valid → use it immediately.
- If the signature has expired/is missing → call /auth/signature to generate a new one, then cache it to Redis.
Drawbacks
Performance Overhead
The process of generating an HMAC involves calculating a hash function twice, which can be computationally expensive. This overhead can cause latency in systems that require real-time or near-real-time data transmission.
Conclusion
This approach using API Key + HMAC signature + short-lived caching via Redis + server-side proxy with Next.js is a robust and scalable design for securing public, tenant-scoped APIs. It balances security (HMAC, timestamps, replay protection) with performance (Redis caching) while keeping client secrets safe from exposure.
Thus, never trust the client, avoid points of failure, and always have a backup plan.